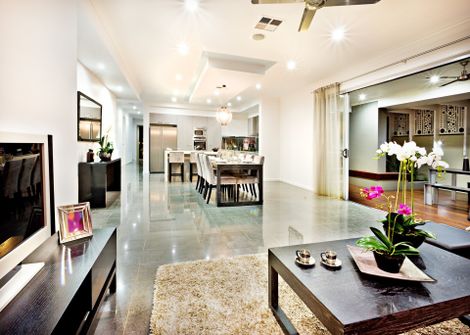
Through the flooring innovations of today, ceramic tile is not only more affordable, but is also easier to maintain. The options for color, patterns, sizes, shapes and design are infinite. At Sam’s Flooring, we are sure that with the many different stones we have available, you will be able to find just the right stone for your home and design needs.
Before looking at stone, there are a few things you should be educated on. The first thing is that there are four distinct types of stone. These include Ceramic, Porcelain, Marble and Granite. Within the Ceramic selections, there is glazed tile and unglazed floor tile (aka Natural Stone). Glazed is the most common and it has a special coating that is applied to the body of the tile and then fired at a very hot temperature to seal the tile. The glazing then creates a hard and non-porous result. The benefits of glazed stone include Stain Resistance, Scratch Resistant, Fire Resistant, Fade Resistant, Slip Resistant and the best feature, Ease of Cleaning!
The unglazed floor tile (aka Natural Stone) is free of the glazing process. However, while unglazed tile can be incredibly beautiful, it is porous and needs to be maintained regularly. There is a special sealant that can be applied to prevent stains and the seepage of spills and general dirt into the pours of the stone.
Porcelain Tile is a type of Ceramic that is made of very fine mixture of clays and minerals. The molecular makeup is similar to fine china or high end dinnerware. These clays allow porcelain tile to be fired at even hotter temperatures than the ceramic tiles, typically near 2400 degrees (F). The higher the temperature, the denser the tile will become and the less moisture it will attract. The benefits of Porcelain are similar to those of ceramic, they are denser and harder than most other tiles, they are highly stain and moisture resistant, they are naturally hygienic with an easy to clean surface. Lastly, porcelain is not only beautiful but equally durable and it can be used in both residential and commercial scenarios.
Marble, Granite & Limestone are very popular stones today. These three stones are all naturally made and therefore individually unique. They are mined out of quarries and consequently, no two stones are ever the same. One important feature of these types of materials is that they need to be sealed. They can be extremely porous and therefore care needs to be taken with the maintenance. While they are porous, it is not hard to care for them, which makes them very popular in many homes today.
It is common to grout your tile after installation. This is a mixture of cement and a color additive. Also a liquid latex additive can be added to the grout to give better resiliency to the grouted areas. It is common for grout to change color slightly over time.
Types
Ceramic tile has been used for centuries and offers consumers more options in color, texture, pattern and overall beauty than most other floor covering materials. With new manufacturing techniques today’s ceramic tile designs are virtually indistinguishable from natural marbles, travertines, slates and other stone products. Glazed ceramic and porcelain tiles are great choices for bathrooms, kitchens, foyers, sun rooms and great rooms.
For over a century homeowners have counted on Mohawk for all their floor coverings. With Mohawk Ceramic Tile you can let your imagination go free and express your unique and personal decorating tastes. Mohawk Ceramic Tile features all the latest tile fashion trends in colors, sizes and designs including decorative insets and borders. To help you select your Mohawk Ceramic Tile there are some terms you should know before going shopping.
Wall Tile
Ceramic wall tiles are normally less durable than tile designed specifically for flooring. Most wall tile is glazed with a semi-gloss or matte surface. The glazed surface has a very low slip resistance and becomes slippery when wet. Therefore, glazed wall tile is much more suited for wall or countertop applications rather than floors.
Glazed Ceramic Tile
Glazed Ceramic Tile is comprised of two basic elements, clay and water. Various clays are mined, ground and blended to a fine powder, and pressed together to form the body of the tile. The pressed clay body is then dried to reduce the moisture content. Next, the surface of the tile is coated with a colored glaze (similar to glass). The glaze is then permanently fused to the surface of the tile by firing it in kilns at approximately 2000° Fahrenheit, to form the finished product.
Porcelain Tile
Porcelain tile is made from a blend of fine-grain clays and other minerals to produce a very dense body, which makes it highly resistant to moisture, staining and wear. Because of these features, porcelain tile will withstand years of heavy foot traffic in both interior and exterior applications while maintaining its color and beauty.
ColorBody™ Porcelain Tile
This is the densest of all tile types, ColorBody™ Porcelain Tile has a through-color body and is defined by its <0.5% water absorption. These tiles can withstand heavy foot traffic and are suitable for both indoor or outdoor applications.
To determine the overall performance and durability of the glazed surface of ceramic tile, there are standardized industry tests and classifications which rate tile’s specific resistance to scratching, breaking, abrasion, moisture, etc…
Scratch Hardness
Most tiles are rated for hardness or scratch resistance using the MOHS Test and rating system. The MOHS test rates tile from 1 (softest) to 10 (hardest). Ceramic tile with a value of 5 or more is suitable for most residential floor tile applications. Tile with a value of 7 or higher is normally acceptable for most commercial applications or heavy traffic areas.
Wear Rating
To help select suitable tiles for specific applications tiles are rated the P.E.I. (Porcelain Enamel Institute) scale. The tiles are evaluated for wear resistance on a scale from 1 (lowest) to 5 (highest).
- PEI 1: Light Traffic – recommended for residential bathrooms or other areas with light traffic and where shoes are not frequently used.
- PEI 2: Medium Traffic – recommended for residential interiors, except entryways, kitchens, stairs or any area where tiles may come into contact with gravel or sand.
- PEI 3: Medium-heavy Traffic – recommended for all residential interiors and light commercial applications. Not recommended for commercial entryway.
- PEI 4: Heavy Traffic – suitable for all residential interiors and most commercial applications, including shopping malls and public areas.
- PEI 5: Heavy-plus Traffic – all residential and commercial areas where heavy-duty wearability is needed.
Water Absorption
Ceramic tile are also classified by their water absorption rate which reflects the density of the body of the tile. There is a direct relationship to the water absorption rate and the suitability of the various types of tile for interior or exterior applications. Tiles suitable for exterior applications must have a very low water absorption rate, especially in climates subject to freezing and thawing cycles. These are typically porcelain body tiles which have a moisture absorption rating of less than .5 %.
Shading
Like the natural products themselves tiles will vary in shading. This adds to the beauty and design of the products. When choosing a tile it’s best to view 2-3 tiles together to visually determine the overall appearance of the tile.
Installation
Step 1: Surface Preparation 
Tile may be installed over most structurally sound substrates, if they are clean, smooth, dry and free of wax, soap scum and grease. Any damaged, loose or uneven areas must be repaired, patched and leveled. Remove any moldings, trim, appliances, etc., which could interfere with installation. Door jambs may be undercut for tile to slip under.
Step 2: Layout
Begin by marking the center point of all four walls. Snap chalk lines between the center points of opposite walls, which will intersect at the center of room. Make sure they’re perfectly square, and adjust if necessary. Next, lay out a row of loose tiles along the center lines in both directions, leaving spaces for uniform joints (use tile spacers). If this layout leaves cuts smaller than 1/2 tile at walls, adjust the center line by snapping a new line 1/2 tile closer to the wall. Repeat along other center line if necessary. Now divide the room into smaller grids (approx. 2′ x 3′) by snapping additional lines parallel to center lines.
Step 3: Applying Adhesive
Select the right adhesive for the substrate you’re using. Carefully read and follow all instructions and precautions on the adhesive or mortar package. Mix only enough to be used within 30 minutes. Using the type trowel recommended on the adhesive package, spread a 1/4″ coat on the surface of one grid area, using the flat side of the trowel. Do not cover guidelines. Next, use the notched side of trowel to comb adhesive into standing ridges by holding trowel at a 45-degree angle. Then remove excess adhesive, leaving a uniform, ridged setting bed. Don’t spread a larger area than can be set in 15 minutes
Step 4: Cutting Tile 
Measure tiles to be cut carefully and mark with a pencil or felt-tip pen. Make straight or diagonal cuts with a tile cutter, curved cuts with a nipper (chipping away small pieces for best results), full-length curved cuts with a rod saw. Sharp-cut edges may be smoothed with a carborundum stone.
Step 5: Setting Tile
Variation of shades is an inherent characteristic of ceramic tile — mix tiles from several cartons as you set, for a blended effect. Begin installing tiles in the center of the room, one grid at a time. Finish each grid before moving to the next. Start with the first tile in the corner of the grid and work outward. Set tiles one at a time using a slight twisting motion. Don’t slide tiles into place. Insert tile spacers as each tile is set, or leave equal joints between tiles. Fit perimeter tiles in each grid last, leaving 1/4″ gap between tile and wall. When grid is completely installed, tap in all tiles with a rubber mallet or hammer and wood block, to ensure a good bond and level plane. Remove excess adhesive from joints with a putty knife, and from tile with a damp sponge. Do not walk on tiles until they are set (usually in 24 hours).
Step 6: Grouting Joints
Generally, you should wait about 24 hours before grouting (refer to the adhesive package for specifics). Carefully read and follow all instructions and precautions on the grout package. Make only enough to use in about 30 minutes. Remove tile spacers and spread grout on the tile surface, forcing down into joints with a rubber grout float or squeegee. Tilt the float at a 45-degree angle. Remove excess grout from surface immediately with the edge of float. Tilt it at a 90-degree angle and scrape it diagonally across tiles. Wait 15-20 minutes for grout to set slightly, then use a damp sponge to clean grout residue from surface and smooth the grout joints. Rinse sponge frequently and change water as needed. Let dry until grout is hard and haze forms on tile surface, then polish with a soft cloth. Rinse again with sponge and clean water if necessary. Wait 72 hours for heavy use. Don’t apply sealers or polishes for three weeks, and then only in accordance with manufacturer’s recommendations.
Care and Maintenance
The Do’s and Don’ts of Tile Care
Regular upkeep will help your floors, walls, and countertops remain as vibrant as the day you installed them. Here’s some helpful Do’s and Don’ts to keep in mind when treating your Mohawk Ceramic Tile:
Do’s
- Do sweep or vacuum floor areas prior to cleaning to remove any dust or debris.
- Do test scouring powders and sealants on a small area prior to full application.
- Do use a sealer on grout joints shortly after installation and use products compatible with cleaning grout joints.
- Do rinse entire area with clear water after cleaning to remove any cleaning solution residue.
- Do have a damaged or broken tile removed and replaced only by a qualified tile contractor.
Don’ts
- Do not use cleaners containing acid or bleach for routine maintenance.
- Do not use wax based cleaners, oil-based detergents or sealants to maintain your tile (sealants may be used on grout joints).
- Do not harsh cleaning aids like steel wool pads or any scouring pads containing metal.
- Do not use a cleaning agent that contains color (unglazed tile only)
After Installation: Care
Glazed, unglazed, stone, glass and soft clay tiles may require different cleaning agents. Clean glazed tile products regularly with an all-purpose, non-oil-based household or commercial cleaner which is also grout-joint-cleaning-compatible. Multipurpose spray cleaners for everyday use will remove soap scum, hard water deposits, and mildew and can be used on wall tile areas in residential baths and showers. You should clean unglazed tile with concentrated tile cleaners that have a neutral pH for safe regular use. These are better able to removing grease, oils and normal spills from unglazed products (these products may also vary depending on application, use and amount of traffic). For routine cleaning of glass tile, use any non-abrasive cleaning compound recommended for either glass or tile.
Once-a-Week Mopping
Damp-mop your ceramic floor a minimum of once each week, more frequently for heavy traffic areas. (Wait at least 72 hours after initial installation before mopping or cleaning to so new tile and grout can dry adequately.) This will decrease wear and abrasion from grit and soil. Do not use detergents, soaps, or any of the chemicals listed above.
Floor Mats Protect Your Floors
High-quality floor mats at entrances and exits are key to reducing tile wear. They collect and trap all the corrosive substances that can be tracked in from outdoors, including dirt, sand, grit, oil, asphalt, or even driveway sealer. Also use mats in areas of constant pressure, such as in front of vanities, kitchen sinks and stoves.
Protective Pads On Furniture — A Good Idea
Attach felt or similar protective pads to all furniture legs, including outdoor metal furniture that rests on tile floors or patios, as it may rust and cause staining.
Brands we carry:
American Olean, Florida Tile, Marazzi, US Ceramic, Lint Tile, Questech, Renaissance Tile